

Upload Files to Supabase using React, Antd and Typescript


Lets start by creating a new react app:
yarn create vite supabase-file-upload --template react-ts
Now install antd and supabase client library:
yarn add @supabase/supabase-js antd
Create a new supabase project by visiting supabase.com
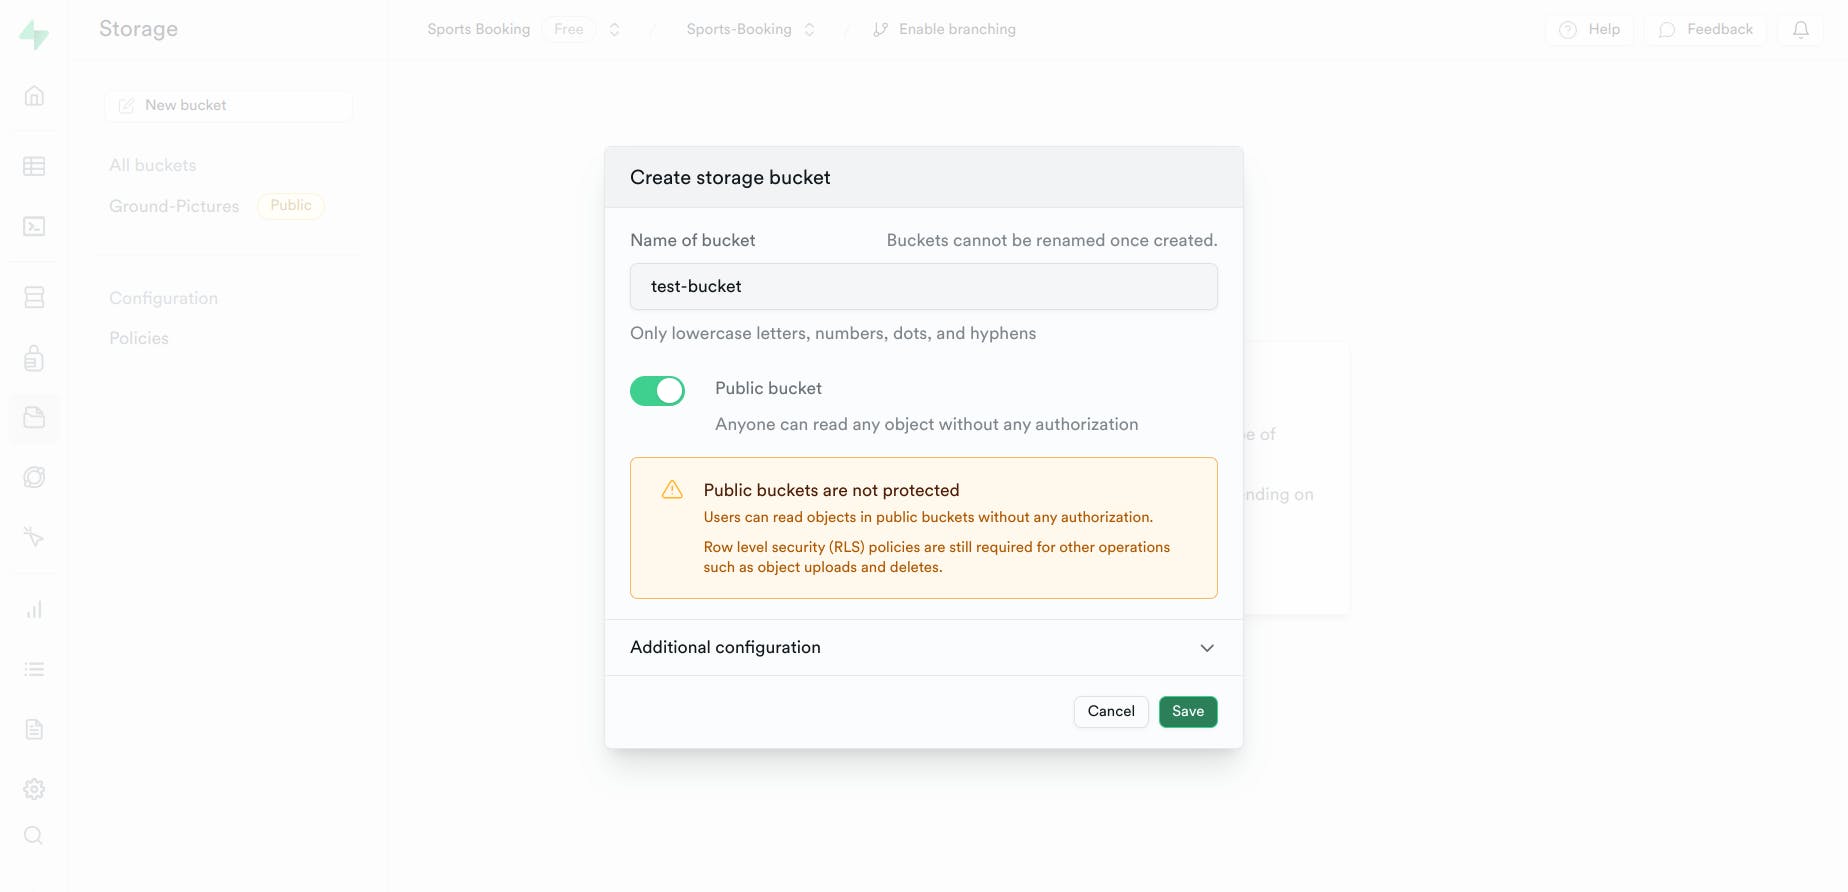
Now go to your project's dashboard and create a new bucket. For the sake of this tutorial we can keep this bucket as public.
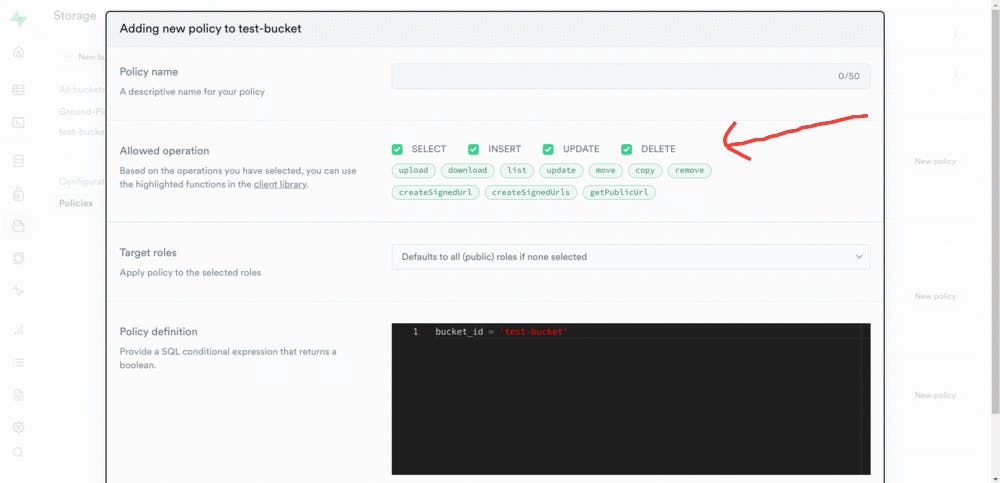
Now make sure to allow relevant operations by creating a new policy on your bucket:
Now retrieve Project URL , API Key and Bucket Name from your project's dashboard and create .env file with these three values:
VITE_SUPABASE_URL=Your-Project-URL
VITE_SUPABASE_KEY=Your-API-Key
VITE_SUPABASE_BUCKET=Your-Bucket-Name
Create a file supabase.ts in your project and paste following code:
import { createClient } from "@supabase/supabase-js";

const supabase = createClient(
  import.meta.env.VITE_SUPABASE_URL,
  import.meta.env.VITE_SUPABASE_KEY
);

export default supabase;
In this file we are initializing supabase client that will be used to interact with our bucket.
Now lets write code that will be responsible for uploading file to bucket. For this, add the following code to App.tsx or create a new component:
import { Button, Upload, UploadFile, UploadProps } from "antd";
import { useState } from "react";
import supabase from "./supabase";
import { UploadOutlined } from "@ant-design/icons";

const supabaseUrl = import.meta.env.VITE_SUPABASE_URL;
const supabaseBucket = import.meta.env.VITE_SUPABASE_BUCKET;

const App = () => {
  const [fileList, setFileList] = useState<UploadFile[]>([]);

  const customRequest: UploadProps["customRequest"] = async ({
    file,
    onSuccess,
    onError,
  }) => {
    try {
      const uploadFile = file as UploadFile;
      const { data, error } = await supabase.storage
        .from(supabaseBucket)
        .upload(`public/${uploadFile.name}`, uploadFile, { upsert: true });

      if (error) {
        throw new Error();
      }

      const publicUrl =
        supabaseUrl +
        "/storage/v1/object/public/" +
        `${supabaseBucket}/` +
        data.path;

      console.log(publicUrl);

      onSuccess?.("File uploaded successfully!");
    } catch (error) {
      onError?.({ message: "File upload failed.", name: "Upload Error" });
    }
  };

  const onChange: UploadProps["onChange"] = ({ fileList }) => {
    setFileList(fileList);
  };

  const onRemove: UploadProps["onRemove"] = (file) => {
    const newFileList = fileList.filter((item) => item.uid !== file.uid);
    setFileList(newFileList);
  };

  const uploadProps: UploadProps = {
    customRequest,
    fileList,
    onChange,
    onRemove,
  };
  return (
    <Upload {...uploadProps}>
      <Button icon={<UploadOutlined />}>Click to upload file</Button>
    </Upload>
  );
};

export default App;
This wraps up our tutorial.
Head over to Github repo for the finalized code.
Happy Coding!